Skip navigation
Installation Process for 5050 LED Strip Lights - Single Colour & RGB
Installation Process for 5050 LED Strip Lights -Single Colour & RGB (Colour Changing)
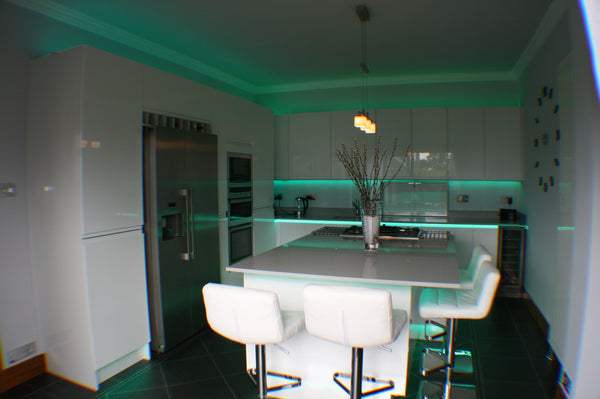
Eden illumination 5050 60 LEDs per metre LED strip lights have various applications and methods of control depending on visual effect required.
 Our 12V LED strip comes in single colour
or
 RGB (Red, Green, Blue, colour changing).
Both require a 12V Power Supply, do not connect directly to 230V supply.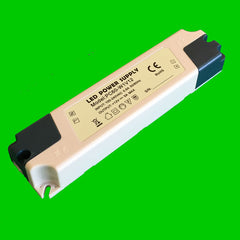
The Strip is 14.4W per m, hence for 1m you will need a 15W power Supply, 5m - 80W and so on.
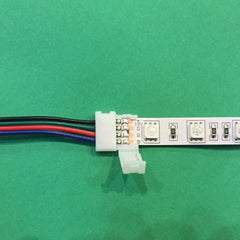
The strip comes in 5m reels and can be cut with scissors every 3 LEDs. When using our plug and play connectors it is best to cut just before the copper contacts to provide more surface area for the connector pins to make contact with. If you soldering or using our connectors please use a file or flat screw driver to scrub the copper contact points on the strip so allowing an improved contact surface.
Dimming
Single colour can be used without a dimmer, RGB requires a Colour Change Remote Controller. Both can be dimmed using the following
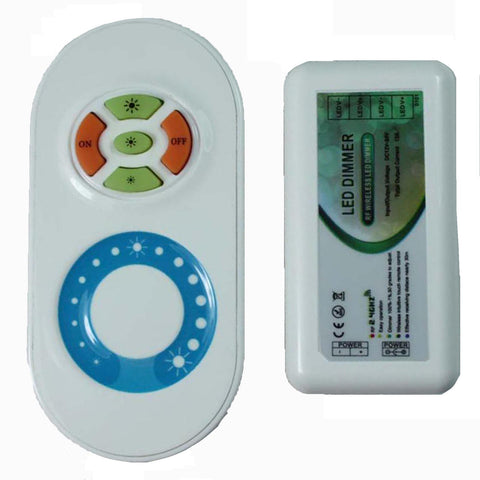 Single colour using a ED08-SF-TOUCH Remote Dimmer
Or
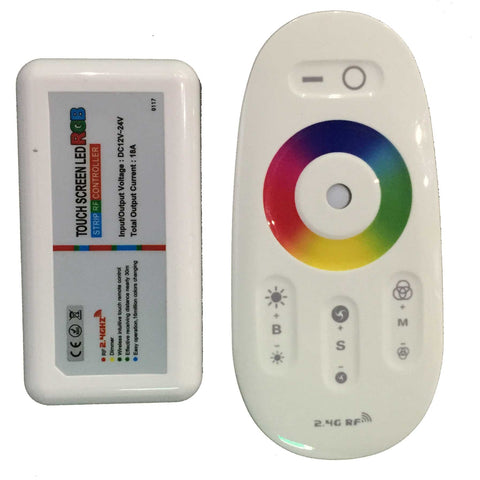 RGB using a ED08-SF-TOUCH-RGB remote & controller 1 Zone
Or
 RGB using ED08-SF-TOUCH-4-RGB remote & controller 4 Zone
Distance
If the distance is more than 10m you will notice a voltage drop especially using RGB. For example if you are installing it around a room in an enclosed pelmet you will need to add in an amplifier (Picture below) which connects to a second power supply at the 10m mark or a convenient corner or join. Otherwise you will find that when the lights end meets the start of the strip, there will be a difference in colour shade.

If you are to have a long run, please ensure you do not make a join in the middle as you may see a slight difference in colour due to the connector reducing the voltage slightly, best to make it one continuous run of strip.
 5050 Single Colour Installation
For every section you are lighting with LED light strips, you will need to provide mains power, this then should be connected to the 12V Power Supply. Each 5m reel of strip comes with around 50mm of cable (2 core, red + & black -) already soldered to the strip. If this is not long enough you can extend it using one of our plug and play connectors. If you require dimming please insert the dimmer controller between the 12V power supply and the LED strip.

Once you have cut the strip to size then you can start to install.
Always install with the lights switch on.
When using our plug and play connectors please stick a supplied sticky pad to the rear of the connector nearest the LED strip and secure to the surface where the product is to be position. If still all lit, then peal off the 3M tape on the reverse of the LED strip and secure the LED strip to its final position. If you need to go around a corner you can either use a fixed corner connector or a wire corner connector. Remember to fit sticky pads to both ends of the connector. Also ensure that the Red + & Black - flows to the next piece of strip in the correct alignment.
If 2 sections or more of LED strips lights are required to work from one remote control to either turn them on or off or for dimming as one, then each one will need a 12V power supply and a individual controller. The remote will need to be paired with both controllers at the same time. Individual remote instructions are supplied with each remote & controller. However you will need to ensure that both controllers are powered up to a illuminated piece of strip next to each other before you install them in their permanent position. Once paired then move them to their final location.


 5050 RGB Colour Installation
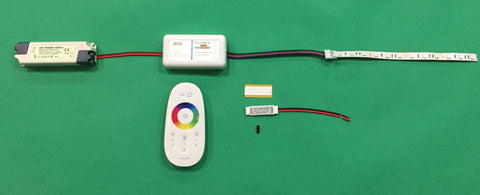
For every section you are lighting with LED strip lights colour changable, you will need to provide mains power, this then should be connected to the 12V Power Supply and then to a RGB controller. Each 5m reel of strip comes with around 50mm of cable (4 core, Black or White Power +, R = Red, G= Green, B = Blue) already soldered to the strip. If this is not long enough you can extend it using one of our plug and play connectors. You will require a RGB controller to change the colours please insert the RGB controller between the 12V power supply and the LED strip.
Once you have cut the strip to size then you can start to install.
Always install with the lights switch on!!
When using our plug and play connectors please stick a supplied sticky pad to the rear of the connector nearest the LED strip and secure to the surface where the product is to be position. With the remote control please check that the lights can show RED, then GREEN and BLUE individually, if not recheck the connector pins, if all working then peal off the 3M tape on the reverse of the LED strip and secure the LED strip to its final position. If you need to go around a corner you can either use a fixed corner connector or a wire corner connector. Remember to fit sticky pads to both ends of the connector. Also ensure that the Power Black or White Cable + & R, G, B flows to the next piece of strip in the correct alignment otherwise you will see different colours.
ED08-SF-TOUCH-RGB - Single Zone RGB controller
If 2 sections or more of LED strips are required to work from one remote control to either turn them on or off or for dimming, then each one will need a 12V power supply and a individual controller. The remote will need to be paired with both controllers at the same time. Individual remote instructions are supplied with each remote & controller. However you will need to ensure that both controllers are powered up to a illuminated piece of strip next to each other before you install them in their permanent position. Once paired then move them to their final location.
ED08-SF-TOUCH-4-RGB - 4 Zone RGB controller
If 2-4 sections or more of LED strips are required to work from one remote control to either turn them on or off or for dimming individually or together as one, then each one will need a 12V power supply and a individual controller. The remote will need to be paired with all controllers at individually. Individual remote instructions are supplied with each remote & controller. However you will need to ensure that all controllers are NOT powered up, just illuminate one zone piece of strip and pair with the require zone 1-4. This can be done in their final position.